The honeymoon is over and we are daring the big projects. Since Milagros is our first boat, we are doing everything for the first time, which takes time. Completely unexpectedly (not) we encounter obstacles that have to be overcome. Our motto is: one step at a time.

Settling in
We are settling in in Mexico, Puerto Peñasco and on our boat in every aspect of our new life. It’s about what products can be bought here and where, about different tastes and smells of fruit, vegetables or for example flour or butter and how you can combine them. And it’s also about getting to know the sounds of the boat and the surroundings. In the first night we were woken up by the train that was honking uninterruptedly while passing through the city or the curfew siren at 11pm depending on the wind direction.
Concerning movement
Sometimes we can hear a bunch of fighting stray dogs. It can also be a very subtle noise like a line banging against a mast or the scraping of our old and useless wind indicator atop the mast. Also, the movement of the boat caused by strong winds was at first concerning (I lay in bed imagining what would happen if the boat fell to one side or the other), but now it’s just normal.
Welcome to boat life
We are settling in and slowly getting used to local customs, boat life and the fact that somehow everything is always a bit more complicated. In addition, since this is our first boat, we’re new to pretty much every project. We have a steep learning curve but still, every undertaking takes additional time. And whenever we make a decision, we always have to remind ourselves that we are not just on vacation for a few weeks, but that this is our new home.

Thus, with the longer-term perspective, some investments that could be dispensed of with short-term view are worthwhile. This also applied to the leaky water hose.
On a mission
So, our second mission was to improve the first mission – the water hose for the fresh water supply on board – so that it stopped leaking. This led to visit number 2 in the Ferreteria (Spanish for hardware store) de Puerto Peñasco. I bought a new hose without further ado as Jim’s hose couldn’t be sealed with Teflon tape. Unfortunately, it was still not tight after all because it started leaking at the water filter.
And why was that even a problem?
We didn’t want to waste a few drops of water every minute for the next 6 months. As a further attempt, Dave therefore removed the water filter and connected the two hose ends directly to one another. That actually could have worked out pretty well. Only the next morning we found that it hadn’t. The hose had burst and had watered the place over night. Luckily it was raining and nobody noticed. So, the next trip to the Ferreteria was due to get a hose connector. This was finally a success and we can now use the hose with a clear conscience: It is tight – 3 days later! That starts off well …
There is a lot to learn with your first boat
Although these small projects are kind of annoying, they nonetheless have some positive sides: We get to know the local shops, learn Spanish, we can practice methodology and patience with something that is not critical and we get to know people on the boat yard. We were also able to do the latter at the bonfire, which takes place every Friday. As the name suggests, everyone brings a beer and a chair (or borrows one like us as we don’t have any) to sit by the fire and talk about boat projects and philosophize about God and the world.

The reason we’re here
But back to why we’re actually here. We have defined our main projects with the highest priority that we absolutely have to do. These are
- hull painting,
- maintenance / replacement of the rigging and inspection / maintenance of the mast,
- repair of the water tanks,
- inspection of the propeller shaft and the rudder,
- upgrade of the Bimini and
- security installations.
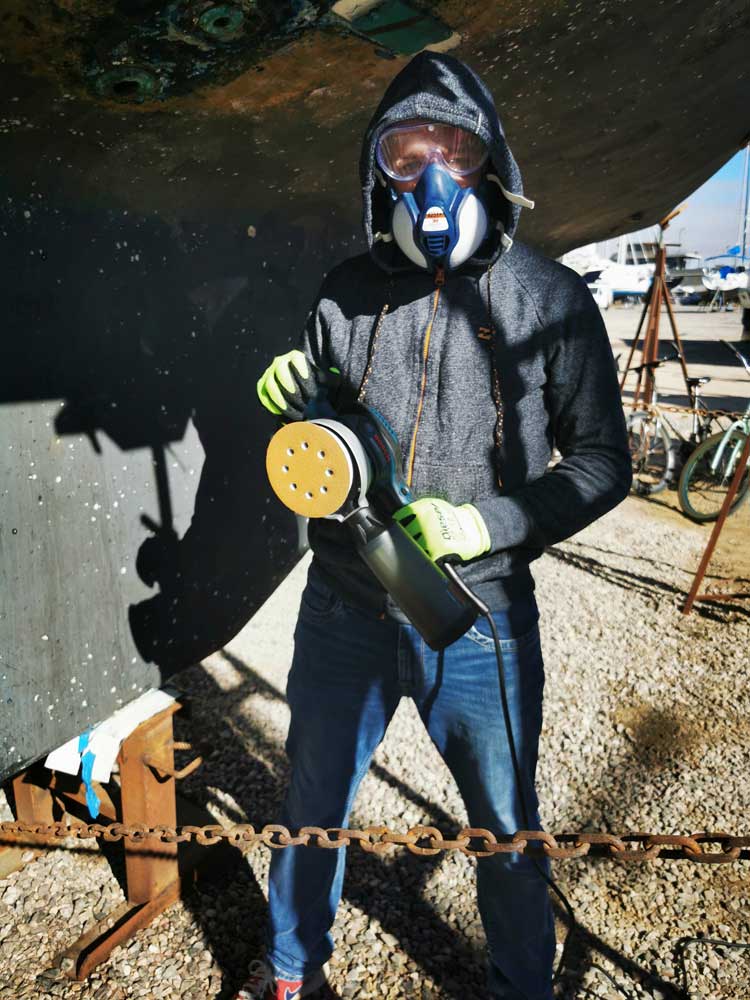
Update on the hull painting
We bought sandpaper discs with different grain sizes in our favourite Ferreteria, where we are already recognized and greeted nicely as soon as we walk in. The aim was to do some test sanding at different points of the hull to see how bad the condition really is. We also bought protective goggles and gloves (yes, of course, safety first). No sooner said than done, Dave did some test sanding in full safety gear.

What does that mean?
The outcome was very interesting. In certain places we saw pits in the fiberglass, small cracks or old repairs. Since we as newbies with our first boat struggled to interpret the results (“Is that bad?”), we shared the results in different places and discussed them with several people. According to the internet, our ship was involved in a collision (very bad), and according to our very experienced Swiss neighbour Alex, Milagros just needs a coat of paint (not bad at all). Because of our fear of osmosis, she led us to another ship on the boat yard. She pointed at the hull and said “Can you see this, that’s osmosis. What you got is nothing!” In fact, there were large and deep blisters from which acidic water ran out. We really don’t have that.


Puerto Peñasco is sold out
We still have to decide whether we should sand the hull ourselves or have it sandblasted – time vs. money. We want to try it ourselves first and see how far we can get. That means we need sanding material. Unfortunately, not a single shop we visited had enough on stock. The sales clerk in our Ferreteria was also astonished when we asked for “cuatrocientos piezas del número sesenta”. But we can order the 400 pieces, he said. We nodded vigorously and now hope that it will work.
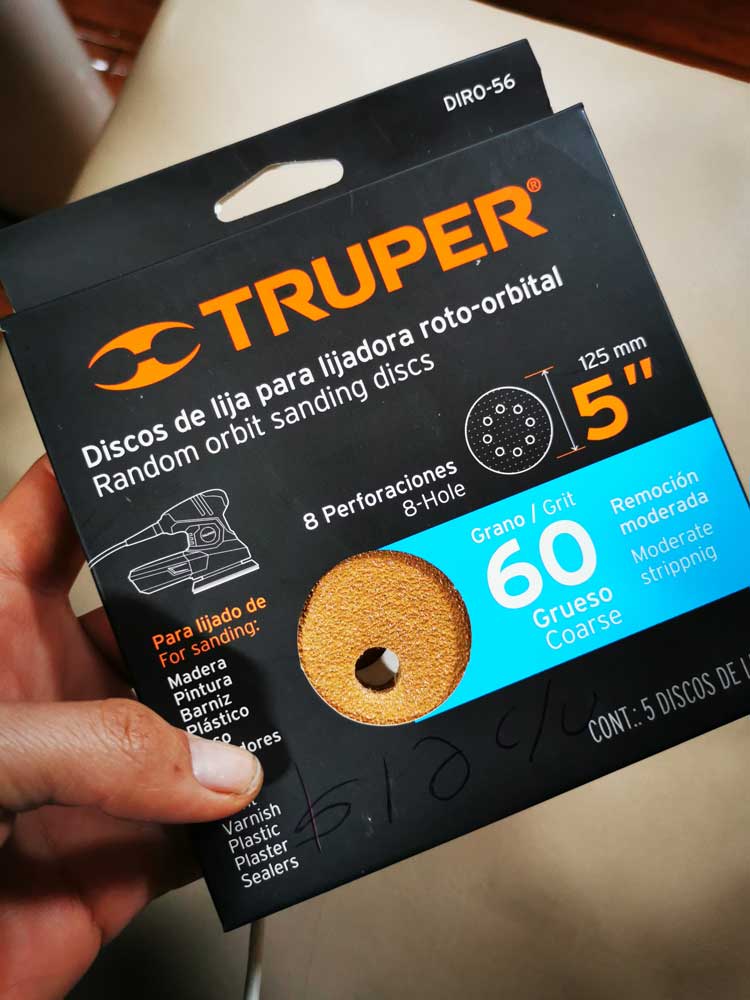
The desired sanding discs 
Boat work always means a mess
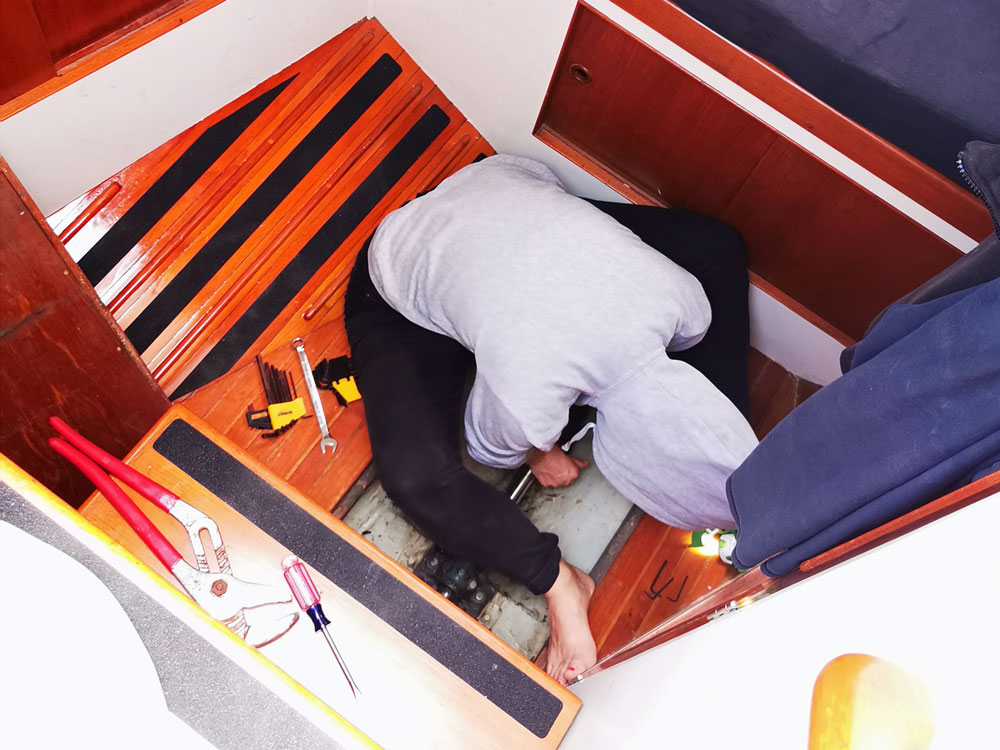
The propeller / shaft / rudder project
Since a liquid was trickling out of the propeller shaft, which looked and smelled as if osmosis or corrosion was happening inside, we wanted to know more precisely what was going on. We also found that the shaft had too much play and that we had to replace the cutless bearing anyway. And since the rudders are a weak point of the Kelly Peterson 44, we want to inspect it more closely. The correct sequence is: remove the propeller, pull out the shaft, remove the rudder. Sounds simple, but as you can imagine, it is easier said than done.
You just need the right tools
It all started when we needed a combination wrench to loosen the two nuts that hold the propeller in place. Of course, we didn’t have one with size needed. And the question was: what size anyway? To find out, we needed a calliper, which we don’t have on board yet, too. So, we borrowed one from our neighbours and measured 1½ inches. When we wanted to go and buy a combination wrench size of that size, we couldn’t find one in any store. The largest they had was 1¼ inches. Finally, after a long search, we found one in the yard. And yeah, the nuts were loosened in no time.

How many people does it take to remove a propeller?
Well, next up was the propeller. For this you need a propeller puller, which of course we don’t have either. After asking around we found out that we could borrow Laura and Marc’s. But the propeller apparently didn’t really want to leave its shaft. So, the big guns had to be brought in. Marc brought his Bunsen burner and a hammer. Under the watchful eyes of 5 people and a dog, the propeller and shaft were heated and after a targeted blow with the hammer the propeller finally came loose. Here is a warning to other boat owners: Never use a hammer on the shaft when it is still connected to the gearbox. The vibrations and shocks can lead to damage which is expensive!

How many people do you need to remove a propeller? 
The prop puller in action
Now it was the shaft’s turn
Attention, now it’s getting technical. Where the shaft enters the boat, there is a cutless bearing (a metal tube lined with rubber) that is cooled with seawater. This is followed by a so-called dripless seal made of rubber, which is attached to the shaft with a stainless-steel collar and ensures that no seawater enters the boat. In our case the shaft is then supported by a pillow bearing before it is connected to the gearbox with a coupling.

Working on the shaft 
The dripless shaft sealing
Why is it important to know?
All of these units hold the shaft in place and must be removed before pulling it. We’ve started with the dripless seal and have already encountered the first problems: One of the four set screws with which the collar is fastened to the shaft was jammed and already rounded. The internet, friends and other sailors eagerly gave us tips on how to loosen this screw. We started with WD40 and trying to the Allen key with the help of pliers – but to no avail. Even hammering in a Torx bit into the worn out set screw did not lead to the desired result.
How far should you go?
We were already mentally prepared to drill out the screw when muriatic acid was handed to us by a fellow sailor. This is used to remove impurities such as rust on metals. Armed with gloves and protective goggles, we poured the 1: 1 diluted acid into the screw holes. Lo and behold: We hammered the Torx bit into the screw again and were finally able to loosen it. And muriatic acid was immediately put on our shopping list.

Just a step or two more
After we have successfully removed the pillow bearing, the last step is to remove the coupling before we can finally remove the shaft. You read that right – this sentence is written in present tense. Spoiler: We haven’t made it yet. The limited space in the engine room and the limited resources require a great deal of creativity. And again: first boat – first time. But more about that next week.

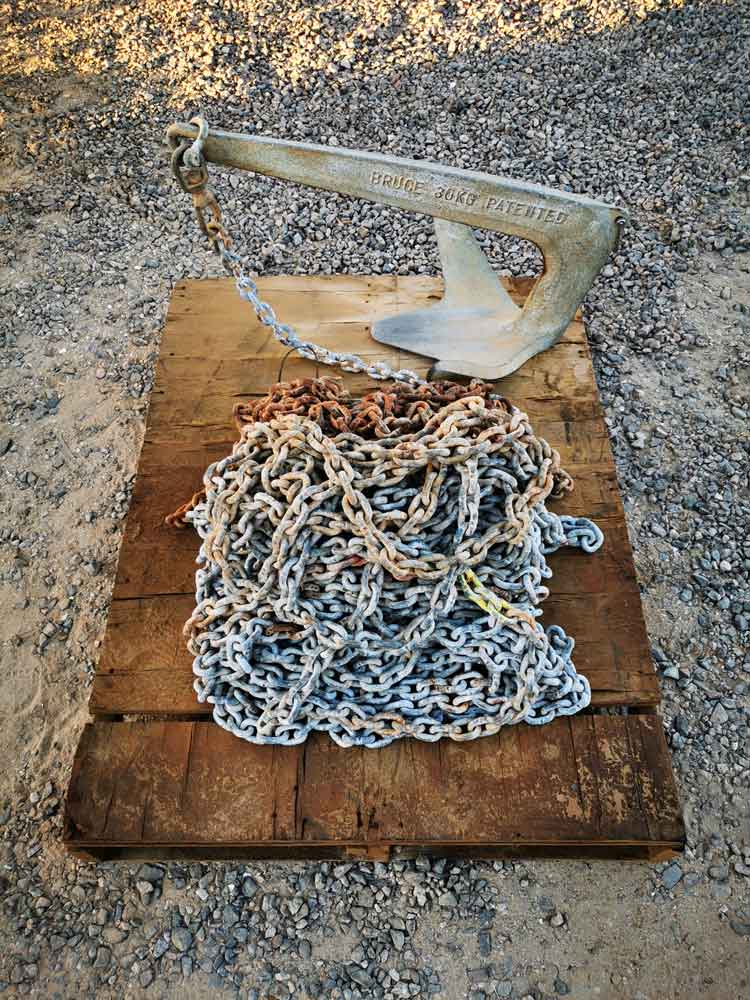
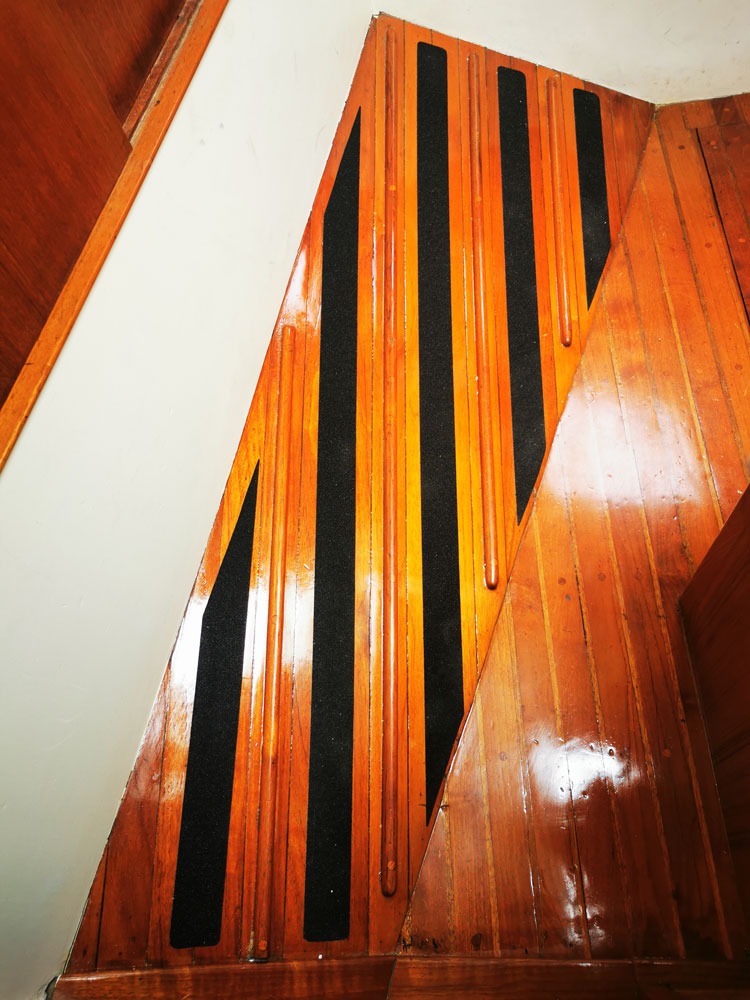
It never gets boring
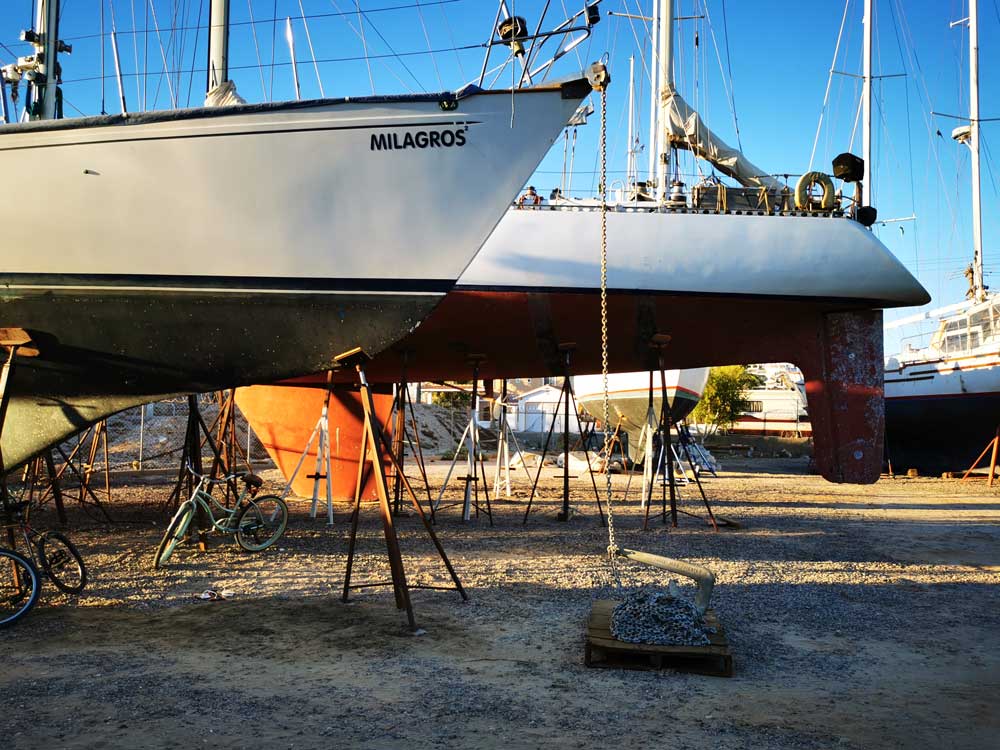
In the meantime, we did smaller projects like putting anti-slip strips on the floor, installing coat hooks or lowering the anchor and its chain for an inspection. For honey cutlets for breakfast, I also dared to bake plaited swiss bread with our gas oven. During the preheating, my enthusiasm (yay, the oven makes it to 200 degrees this time) turned to disillusionment (it’s 200 degrees FAHRENHEIT, this means 100 degrees Celsius only).

Fahrenheit vs. Celsius
Still a success
Nonetheless, I was able to bake my bread at 160 ° C, but with adjusted extra small diameter to compensate for the lower temperature. The planned 20 minutes of baking time turned into 40 minutes – but it was delicious eventually.
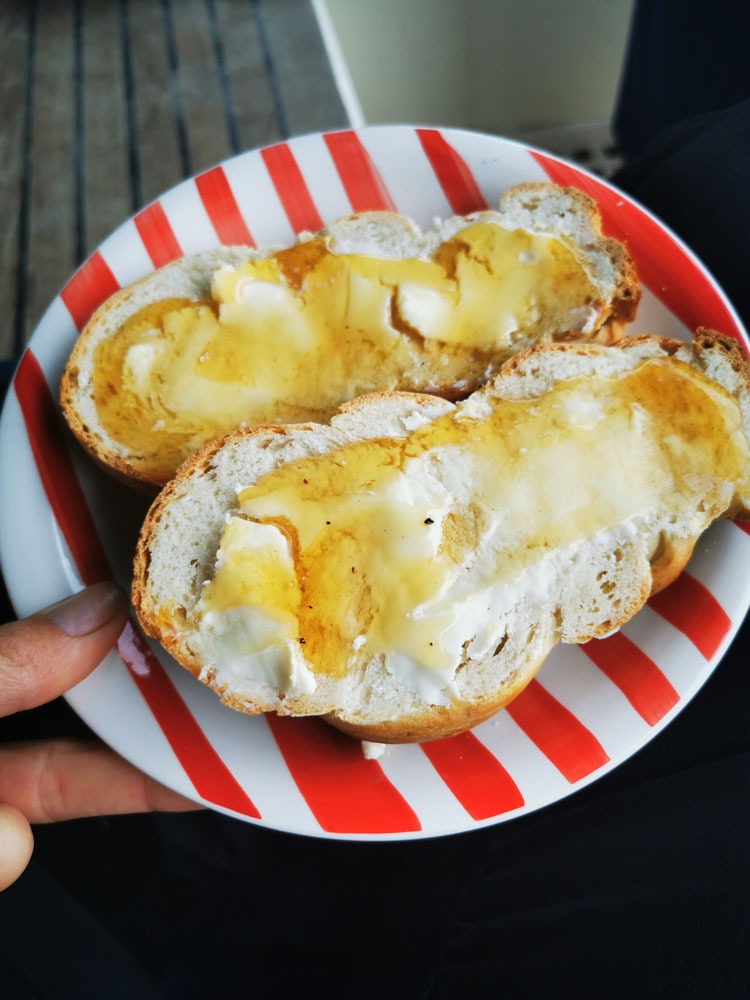
Honey cutlets 
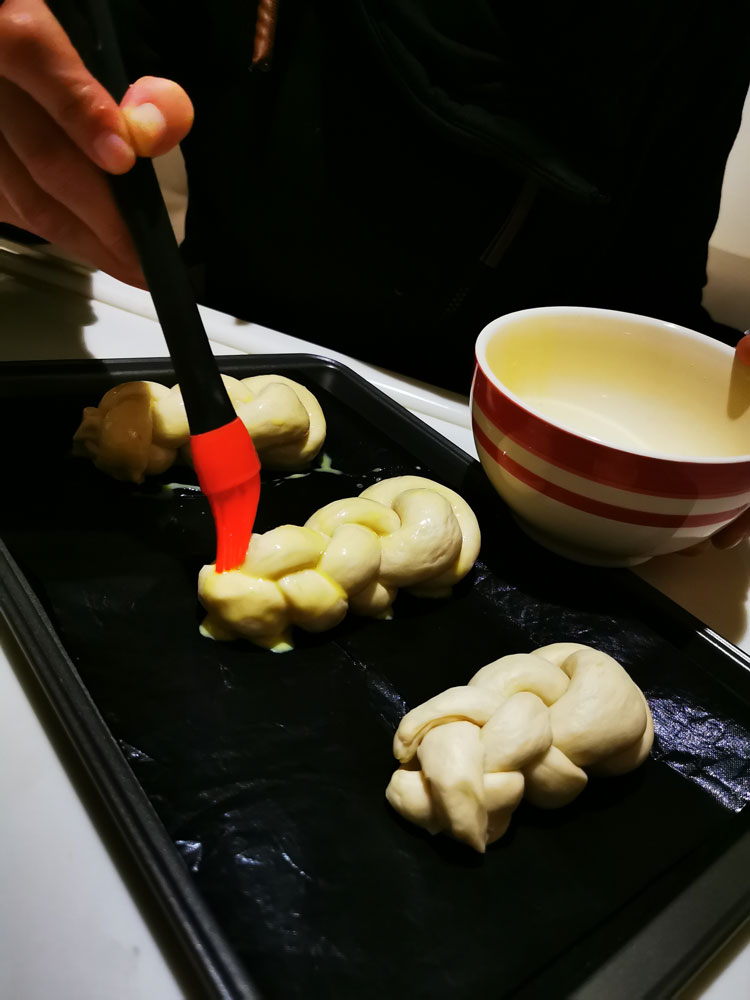

“Zopf” – plaited swiss bread
I don’t know if the stove and I will ever become friends. We make ourselves tacos on it every day, but I just dropped a frying pan full of hot peppers from the stove into a bucket of soapy water. It’s not nice. But if you have no other problems …

Taco Time 
A pan in a bucket…
If you appreciate our weekly entertainment, you can head over to Patreon and become a monthly supporter. Thank you so much for your support!


