We are removing thru hulls in order to close the holes before we paint Milagros’ hull. Now is the best time to do it. But not everything is going smoothly – for example, we have to carry out an emergency operation on our orbital sander. Also one of our big projects needs a reassessment and is therefore delayed.

After sanding the gelcoat was a thing of the past (yesssss!), we continued to prepare Milagros for her repaint. The next step was to remove the unnecessary thru hull fittings. You may now be wondering how a boat can have unnecessary thru hulls = holes in the boat. Yes, we ask ourselves too. To understand this, it helps to look at it from another side. Namely: What are necessary thru hulls?
What is a thru hull?
A thru hull is a hole in the hull below or above the waterline through which something, usually a liquid, can get out the boat or into the boat. The engine, for example, needs seawater for cooling. The resulting mixture of cooling water and exhaust exits the boat through a thru hull. Thru hulls are usually made of brass, bronze, stainless steel or plastic. They can be either opened or closed with a valve on the inside part of the thru hull, called seacock.

The risk of water ingress
In general, a boat owner would like to have as few thru hulls as possible. Every hole in the hull is a possible source of water ingress and therefore possibly dangerous. For example, when a thru hull is made from stainless steel, it can corrode or the seacock can fail. A fairly small hole can let in a lot of water in a short amount of time. For the order of magnitude: A hole in the boat hull with a diameter of 7.5cm (3in) about 30cm (1ft) below the waterline lets in around 500 litres of water per minute – too much for bilge pumps to cope with. Our thru hulls have a diameter of about 5cm (2in) – a little less, but it’s still uncomfortable if something goes wrong.
Removing thru hulls
On Milagros, we have a total of 20 (!) thru hulls, 13 of them below the waterline. This means that we have to be sure that everything is okay 20 times. The mean thing is that damage cannot always be seen with the naked eye. Since we’re in dry dock, we wanted to take the opportunity to do the inspection without risk. And, according to the motto “as much as necessary, but as little as possible”, wanted to remove some thru hulls. During the inventory we found that 7 of the thru hulls were not in use, 5 of them below the waterline. Why they were still there was a mystery to us: 7 times unnecessary risk, thereof 5 times very big risk! But we found the remaining 13 thru hulls to be necessary.

Well, how do you remove a thru hull?
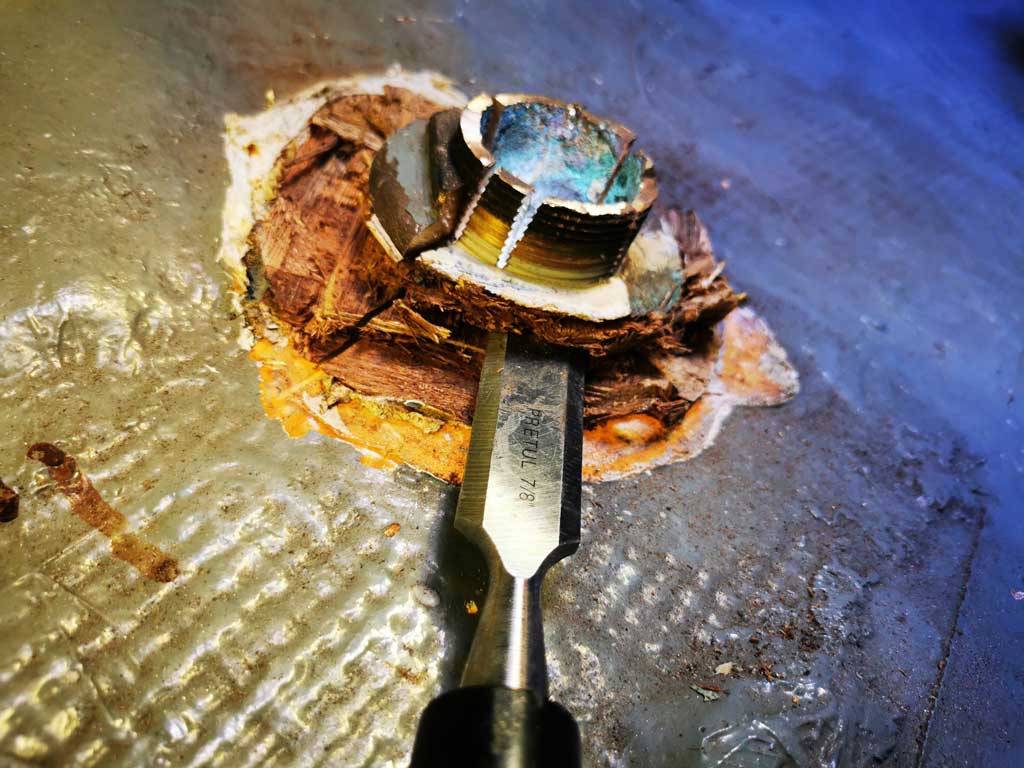
Our thru hulls are all made of bronze. In our spare parts storage, we found a couple of old thru hulls so we could study their removal. We would have loved to have unscrewed all of the thru hulls unharmed. With the right tool (a so-called step wrench), the thru hull could be unscrewed from the outside if someone inside holds on to the counterpart with pliers.


It should come as no surprise that we do not have this tool in our possession. And whoever replaced all the thru hulls 10 years ago, probably wanted to make sure that they would stay there forever. Some also were built onto a wooden structure on the inside, which – like the corresponding nut – was painted over with bilge paint.
With the cutting disc
We tried nicely twice – that is, without destructive violence – but also without success. The nuts didn’t move an inch, even when we chiselled away the wooden support underneath. That’s when we got the angle grinder out. Dave accidentally looked at a few pictures of angle grinder accidents on Google to get in the mood. I declined to look at them because I didn’t want to see cutting discs stuck in faces. Never mind.
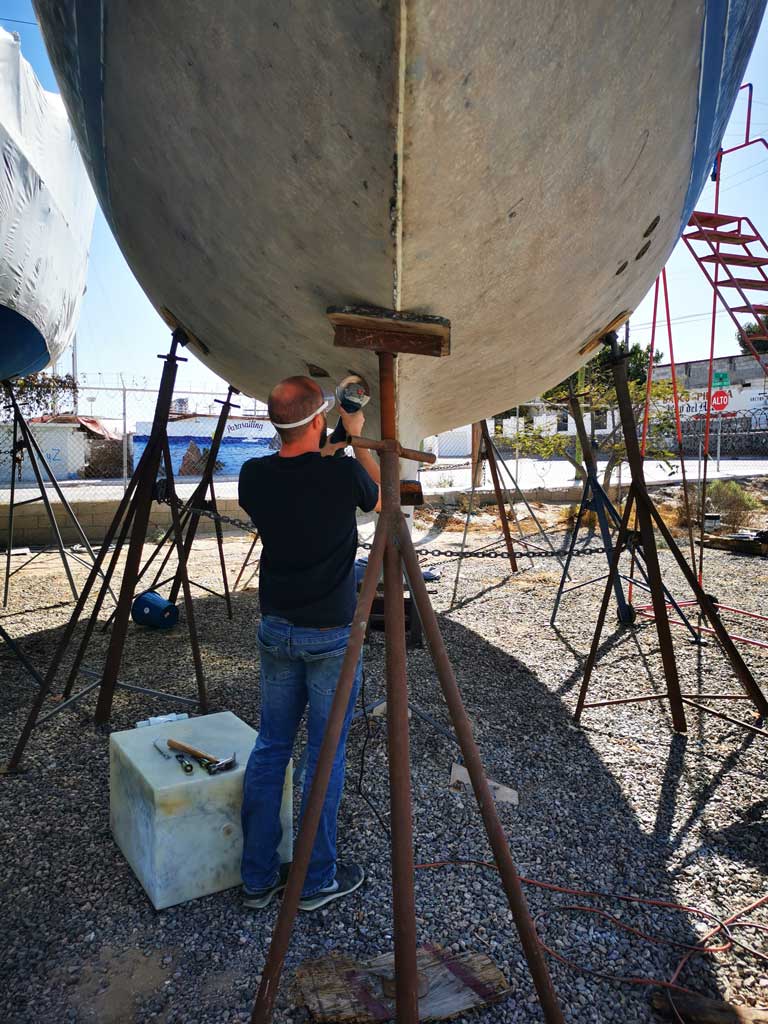
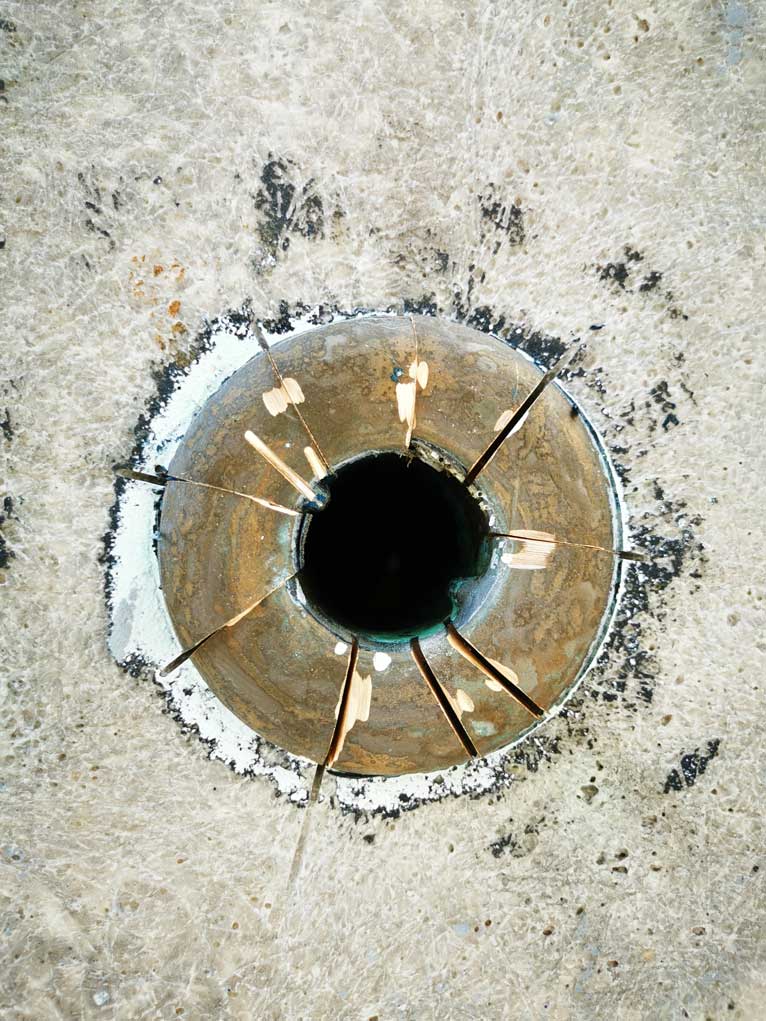
So, the mushroom-shaped head of the fitting is cut into 4-8 pieces from the outside and then separated separated from the thread with a chisel, then the thru hull can be removed.


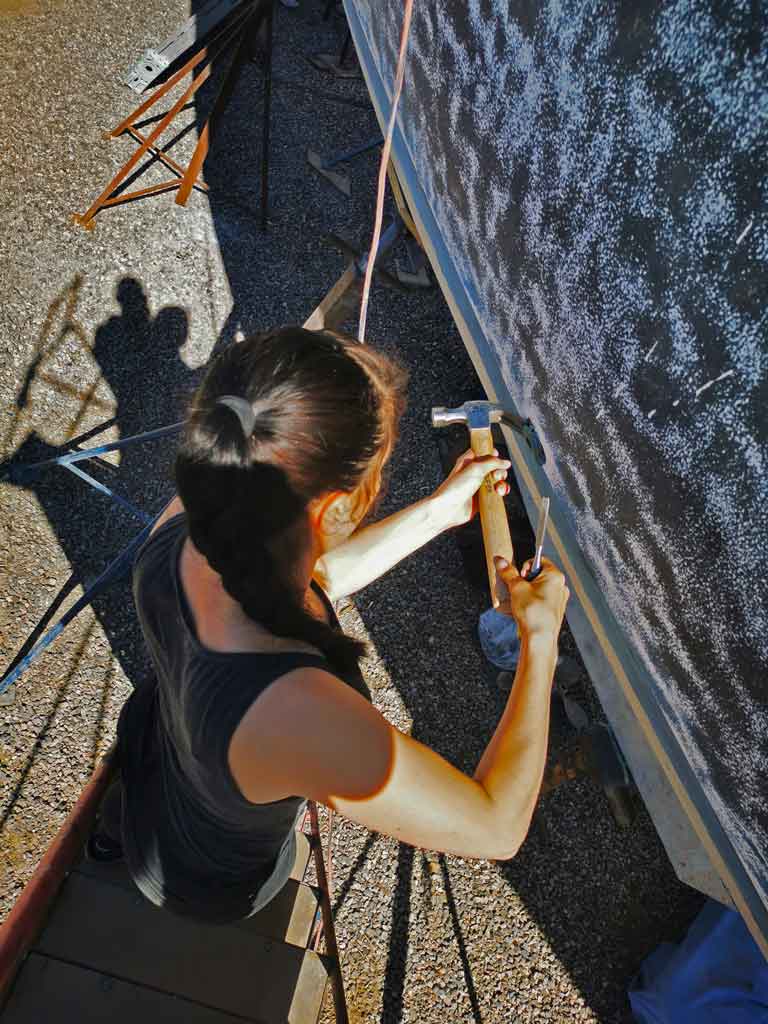
I won’t go into further details here, but as always it sounds easier than it actually is. This includes, for example, hammering in impossible positions with no space to take a swing on a hammer or grab the nuts with pliers. Removing thru hull fittings can be frustrating. But they are all out now and we can close this chapter. Once the necessary material is here, we can start filling the holes with fiberglass.


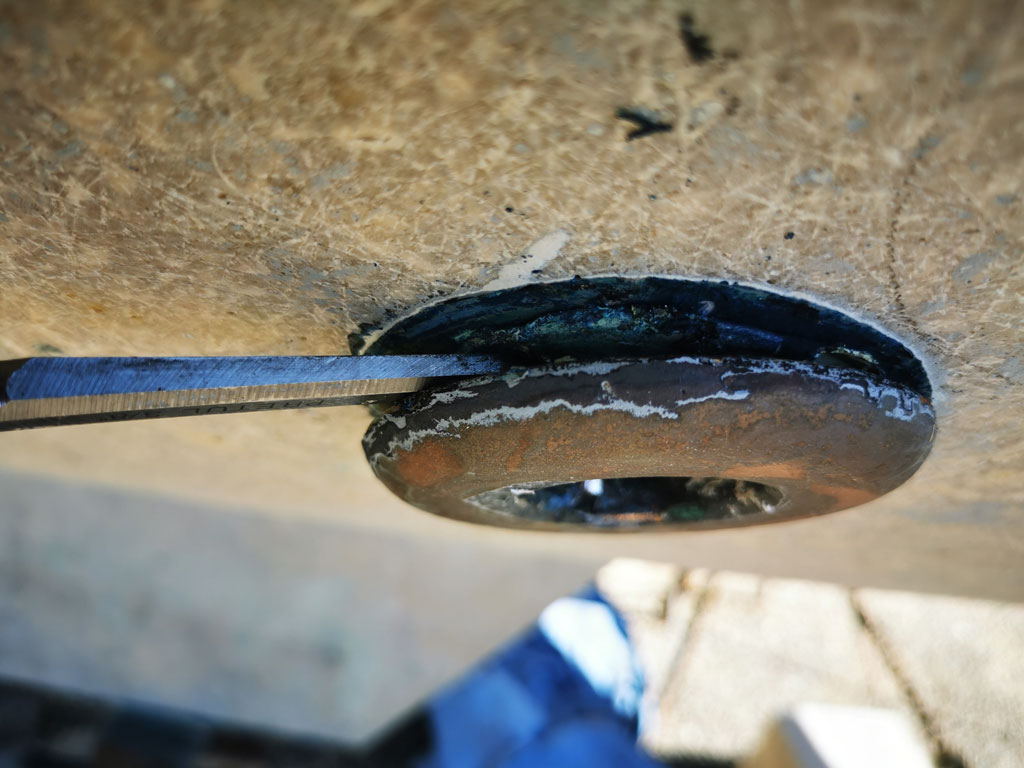
The thickness of our hull 
The removed thru hulls
But still Dairy Queen?
Legend has it, that if something goes wrong here on the boatyard, you comfort yourself with ice cream from Dairy Queen. We haven’t had a true Dairy Queen moment yet (actually good for us), but we were in the mood for ice cream. Not that David challenged it, but the Dairy Queen moment came earlier than we’d liked. Dave just wanted to sand a tiny corner of the hull when he slipped and our beloved Bosch sander started making strange noises. So many hours of sanding without a problem and now that? Dave then had to open the “frustrated” envelope from his “if you are…” box that he had received from his parents before leaving. Colouring in the mandala that was inside and having a beer de-frustrated the situation somewhat.


Help yourself
After letting the damaged sander rest for one night, we performed open heart surgery on it the morning after. We bedded it on a kitchen towel on our dining table, and took it apart, screw by screw, in search of the cause. A broken bearing was the suspect. So, we first tried to get to the bearing from below – unfortunately unsuccessfully – and then from above by dismantling the entire housing.


We worked our way forward, not without fear of scrapping the whole thing. Neither of us had done that before. Learning by doing on a comparably expensive sander is not optimal, but there weren’t any proper alternatives. Unfortunately, the bearing could not be reached from above either. It was very interesting to look at the coils and magnets. But only from looking at it, the sander would not repair itself. So, we put it back together and immediately tested whether it still worked. It did it luckily.

Dr. Dave from Cavu rushes to the spot
Consultation hours at Alegría and Cavu both led to the same result: it MUST be possible to access the bearing from below. The approach of levering out the bearing with two screwdrivers, as shown in a YouTube video, unfortunately did not work. Dr. Dave from Cavu, who rushed to the scene with his first aid kit, was able to unscrew the bearing with the help of a longer screw that he accidentally found on one of our locking pliers. Tadaa. So, we could remove and lubricate the stubborn bearing. After putting the whole machine back together, which, by the way, felt like a 3D puzzle for adults, we tested the sander again and it sounded flawless. While reassembling the sander, we also found out that a plastic piece had come loose too, which caused a rattling noise. Mission accomplished.

What is the wobbly shaft doing?
A call from the workshop, where we had brought our propeller shaft and the shaft bearing, did not bode well. Unfortunately, it was not possible to straighten the prop shaft and they asked whether they should fabricate a new one. But we didn’t want to scrap our prop shaft without a second opinion, so we picked it up from the workshop. We also picked up the pillow bearing, the inner part of which they had already melted down to fit it to the shaft again. Salvador Cabrales took on our shaft directly because he couldn’t believe that it could not be straightened. Two days later we received a message: The shaft had been straightened, costs 800 Pesos (35 CHF). Oh. In the other workshop, the straightening plus the adjustment of the bearing would have cost 5,000 Pesos (200 CHF) …
The rigging project is not going as planned
We wanted to unstep the mast in the last week of February to start the overhaul. And we also wanted to send the steel cables to San Diego, where they should have been replicated in March. That was once the plan, but it is no longer. Since we are not sure whether our rigging is currently tuned correctly, we do not want to simply copy the existing setup. We believe our mast is bent too much, but we don’t know what would be right.

Milagros’ mast is pretty bent 
Measuring the mast rake with a plumb-bob
Marga from SV Dogfish (the other KP44 on the yard) supported us with her knowledge (thanks!). She sent us her checklists and lent us a device with which we can measure the rigging tension and learn more about its settings. Although we’re big fans of learning by doing, we wouldn’t feel comfortable tackling a project of that size all by ourselves. Mistakes in this matter can ultimately result in the loss of the boat.
There is a possible solution
Having someone experienced come on the boat with us in person and assess the rigging with us in person would be win-win situation. Unfortunately, due to the pandemic, that’s pretty difficult right now. But: Due to engine failure, a boat that had left the Astillero Cabrales a few months ago has to return here. And there is a rigger on board – exactly what we need. The reason for the return is very unpleasant and annoying for them, but for us it could be the solution to our problem. We are now keeping our fingers crossed for them for a good weather window, because the conditions for motorless boats are currently not optimal.
Do you need a house?
As I write this, Dave is on the soccer field watching Luis’ team play. We get messages from Luis every day – be it a simple “Hey, what’s going on?” or “Do you know anyone who wants to buy a house here? Do you need one?”. Medical costs force Luis to sell one of his two houses. Since we already have a house a boat, we declined with thanks.
Dulcé, our part-time cat, is lying next to me. If it’s too uncomfortable outside, she shows up at our place and requests admission. We cat lovers can’t say no to that, of course. It just seems like we can’t do without cats.

If you liked this post and if you you want to support our work, you can head over to Patreon and become a monthly supporter. Thank you!

2 Comments
roman
Hola amigos
como estan? que pasa en lejo mexico?
apprenden bien español?
saludos de suiza a ustedes y la gata dulcé
Patricia
Hola amigo, hace sol, hace buen tiempo y la gente es agradable. Saludos de México